Project 2: Math Calculator
Apply your knowledge to build something amazing!
Math Calculator
ℹ️ Info Project Overview
- Difficulty Level: Beginner
- Estimated Time: 2-3 hours
- Skills Practiced:
- JavaScript functions
- Event handling
- Data binding in Svelte
- Basic error handling
- CSS styling
- User interface design
Project Roadmap 🗺️
- 📝 Setup Variables - Create the necessary variables
- ➕ Add Function - Implement addition functionality
- ➖ Subtract Function - Implement subtraction functionality
- ✖️ Multiply Function - Implement multiplication functionality
- ➗ Divide Function - Implement division functionality
- 🎨 Create UI - Build the user interface
- 💅 Add Styling - Apply CSS to make it look professional
- 🛡️ Error Handling - Add validation and error messages
- 🎉 Project Complete! - Test and submit your project
- 🎯 Project Start - Set up your development environment
Guidelines
Mini Project Guidelines
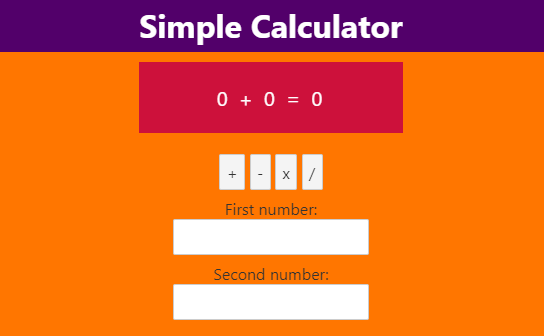
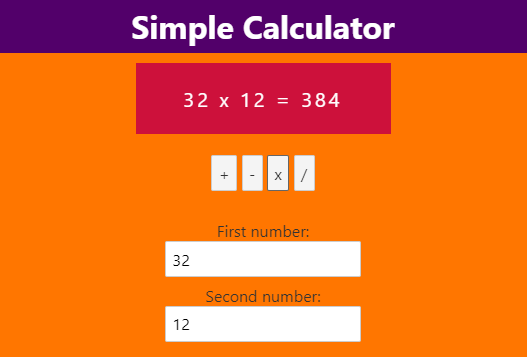
In this exciting lesson, we'll be creating a fully functional Math Calculator that performs basic operations (add, subtract, multiply, divide). By the end, you'll have a calculator that looks professional and works perfectly!
Here are the design examples from Google:
Project Setup
Download Template
- Download
W3-Template-project-02-calculator.zipfrom Templates folder - Extract to your projects folder
- Run the setup script:
./setup.sh - Visit
http://localhost:5173
💡 Tip The
setup.shscript will:
- Check and install dependencies automatically
- Display learning objectives for this project
- Start the development server
💡 What's Included in the Template
- ✅ Variable declarations for calculator state
- ✅ Empty function stubs with hints
- ✅ Complete UI structure with Bootstrap
- ✅ TODO comments guiding implementation
WARNING: Before You Start
DO NOT DELETE the existing files in the template
ONLY EDIT the necessary files in src/routes/
Implementation Guide
Now that you have the template set up, follow the step-by-step instructions below to implement your calculator. The template already includes:
- ✅ Variable declarations (
firstNumber,secondNumber,result) - ✅ Empty function stubs with TODO comments
- ✅ Complete UI with input fields and buttons
- ✅ Styling with Bootstrap and custom CSS
Your job is to implement the logic for each function. Follow along with the instructions below!
Step-by-Step Implementation
Step One: Create Variables
First, let's create the necessary variables to store our calculator's data:
ini
let firstNumber = 0;
let secondNumber = 0;
let result = 0;
💡 Why Initialize to 0? We set our variables to 0 initially so they have a valid number value from the start. This prevents errors and gives users a clean starting point!
🎯 Milestone One: Variables created! You now have storage for your calculator's numbers.
Step 2: Create Addition Function
Now, let's create our first mathematical operation - addition:
ini
function addition() {
    result = firstNumber + secondNumber;
}
What's happening here? When this function runs, it takes firstNumber, adds secondNumber to it, and stores the answer in result.
Step 3: Create Subtraction Function
Next, let's create a subtraction function:
ini
function subtraction() {
    result = firstNumber - secondNumber;
}
Remember: This subtracts the second number FROM the first number. So if firstNumber is 10 and secondNumber is 3, the result will be 7.
Step 4: Create Multiplication Function
Time for multiplication! This function will multiply our two numbers:
ini
function multiplication() {
    result = firstNumber * secondNumber;
}
💡 Fun Fact In programming, we use
*for multiplication instead of×because it's easier to type on a keyboard!
Step 5: Create Division Function
Finally, let's create our division function:
ini
function division() {
    result = firstNumber / secondNumber;
}
⚠️ Common Pitfall #2 What happens if someone tries to divide by zero? We'll fix this later with error handling!
🎯 Milestone 2: All math functions created! Your calculator can now perform all four basic operations.
Step 6: Create the HTML Interface
Now comes the exciting part - creating the user interface! This is what users will see and interact with:
php-template
<div class="container">
    <h1>Math Calculator</h1>

    <div class="input-section">
        <label for="first">First Number:</label>
        <input id="first" bind:value={firstNumber} type="number" />

        <label for="second">Second Number:</label>
        <input id="second" bind:value={secondNumber} type="number" />
    </div>

    <div class="button-section">
        <button on:click={addition}>Add (+)</button>
        <button on:click={subtraction}>Subtract (-)</button>
        <button on:click={multiplication}>Multiply (×)</button>
        <button on:click={division}>Divide (÷)</button>
    </div>

    <div class="result-section">
        <h2>Result: {result}</h2>
    </div>
</div>
💡 Understanding the Code
bind:value={firstNumber}creates a two-way connection between the input and our variableon:click={addition}tells the button to run our addition function when clickedtype="number"ensures users can only input numbers
🎯 Milestone 3: User interface complete! Your calculator now has a way for users to interact with it.
Step 7: Add Styling
Time to make your calculator look amazing! Let's add some professional CSS styling:
php-template
<style>
    .container {
        max-width: 400px;
        margin: 50px auto;
        padding: 20px;
        border: 1px solid #ddd;
        border-radius: 10px;
        text-align: center;
        font-family: Arial, sans-serif;
    }

    .input-section {
        margin: 20px 0;
    }

    .input-section label {
        display: block;
        margin: 10px 0 5px;
        font-weight: bold;
    }

    .input-section input {
        width: 100%;
        padding: 10px;
        border: 1px solid #ccc;
        border-radius: 5px;
        font-size: 16px;
    }

    .button-section {
        margin: 20px 0;
    }

    .button-section button {
        margin: 5px;
        padding: 10px 20px;
        background-color: #007bff;
        color: white;
        border: none;
        border-radius: 5px;
        cursor: pointer;
        font-size: 14px;
    }

    .button-section button:hover {
        background-color: #0056b3;
    }

    .result-section {
        margin: 20px 0;
        padding: 15px;
        background-color: #f8f9fa;
        border-radius: 5px;
    }

    .result-section h2 {
        margin: 0;
        color: #28a745;
    }
</style>
💡 Styling Best Practices
- The
border-radiusproperty gives us smooth, rounded corners- The
:hovereffect makes buttons darker when you hover over them- Using
margin: autocenters our calculator on the page- Green color for results makes them stand out positively!
🎯 Milestone 4: Your calculator now looks professional and is easy to use!
Advanced Features
Great job getting this far! Now let's add some advanced features to make your calculator even better.
Error Handling
Remember our warning about dividing by zero? Let's fix that now:
ini
function division() {
    if (secondNumber === 0) {
        result = "Error: Cannot divide by zero";
    } else {
        result = firstNumber / secondNumber;
    }
}
⚠️ Common Pitfall #3 Always check for division by zero! It's mathematically impossible and will cause errors in your program.
Clear Function
Let's add a helpful clear button to reset everything:
ini
function clear() {
    firstNumber = 0;
    secondNumber = 0;
    result = 0;
}
Don't forget to add the button to your HTML:
css
<button on:click={clear}>Clear</button>
💡 User Experience Tip A clear button is essential for good calculator design. Users make mistakes and need an easy way to start over!
Final Result
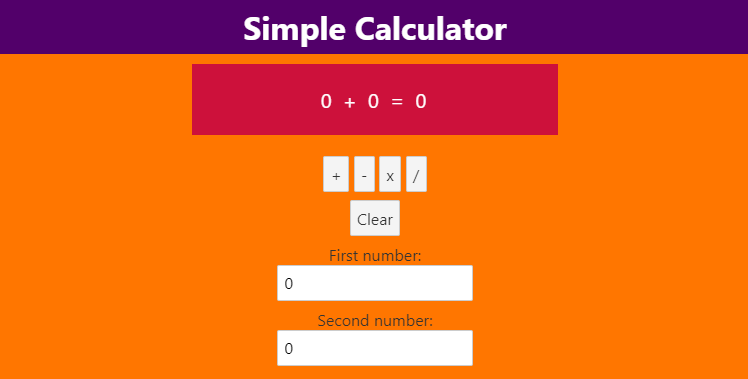
🎯 Milestone 5: Advanced features complete! Your calculator now handles errors gracefully and has a clear function.
Debugging Tips 🐛
Having trouble? Here are common issues and how to fix them:
ℹ️ Info Common Issues & Solutions
-
"My result shows NaN (Not a Number)"
- Check that you're using
type="number"on your inputs - Make sure you're not trying to calculate with empty inputs
- Check that you're using
-
"Clicking buttons doesn't do anything"
- Verify your function names match in both the script and HTML
- Check that you used
on:clicknotonClick
-
"My styling doesn't appear"
- Make sure your
<style>tags are in the right place - Check for typos in CSS property names
- Make sure your
-
"Division gives weird decimal numbers"
- This is normal! You can use
result.toFixed(2)to limit to 2 decimal places
- This is normal! You can use
Extension Challenges 🚀
Ready to take your calculator to the next level? Try these challenges:
Challenge One: Memory Functions (Intermediate)
Add M+, M-, and MR (Memory Recall) buttons:
ini
let memory = 0;

function memoryAdd() {
    memory += result;
}

function memoryClear() {
    memory = 0;
}
Challenge 2: Calculation History (Advanced)
Keep track of the last 5 calculations:
ini
let history = [];

function addToHistory(operation) {
    history = [`${firstNumber} ${operation} ${secondNumber} = ${result}`, ...history].slice(0, 5);
}
Challenge 3: Keyboard Support (Advanced)
Add keyboard shortcuts for operations:
ini
function handleKeypress(event) {
    if (event.key === '+') addition();
    if (event.key === '-') subtraction();
    if (event.key === '*') multiplication();
    if (event.key === '/') division();
    if (event.key === 'c') clear();
}
Challenge 4: Scientific Calculator (Expert)
Add advanced operations like square root, power, and percentage!
Code Review
Math Calculator (Code Review)

AI Prompts
Want to enhance your calculator with AI assistance? Try these prompts to take your project further:
💡 Using AI Effectively When using AI prompts, always:
- Test the generated code thoroughly
- Understand what each line does
- Modify it to fit your specific needs
Helpful Prompts to Try:
- "Add keyboard support for number input and operation shortcuts."
- "Create a history feature that saves previous calculations."
- "Add scientific calculator functions like square root and power operations."
- "Implement a theme switcher for dark/light mode."
- "Add sound effects when buttons are clicked."
- "Create animations for the result display."
Project Submission
Congratulations on completing your Math Calculator! 🎉 You've learned so much:
- Creating functions in JavaScript
- Handling user input
- Implementing error handling
- Styling with CSS
- Building interactive web applications
Before You Submit
⚠️ Final Checklist
- All four operations (add, subtract, multiply, divide) work correctly
- Division by zero shows an error message
- The calculator has professional styling
- Clear button resets all values
- You've tested with different numbers
Ready to Submit?
💡 Pro Tip Take a screenshot of your working calculator to share with friends and family. You built this from scratch - be proud of your achievement!
Remember: Every professional developer started with projects just like this one. Keep practicing, keep building, and keep learning! 🚀