Activity 2: Introduction to HTML
Practice and reinforce the concepts from Lesson 2
My Family Tree Activity
What you'll learn
In this activity, you'll:
- Create a webpage using HTML basic blocks
- Use different heading levels (H1, H2, H3) to organize content
- Add text paragraphs to display family member names
- Apply spacing to make your webpage look neat and organized
- Build a complete family tree webpage from scratch
Before You Start Checklist
- Make sure you're logged into EduBlocks
- Have a list of family members ready (you can use nicknames!)
- Think about how many generations you want to include
- Watch the tutorial video if you need extra help
Activity Overview
⏱️ Total Time: 30-40 minutes
👥 Group Size: Individual activity
🎯 Goal: Create your own family tree webpage using HTML blocks
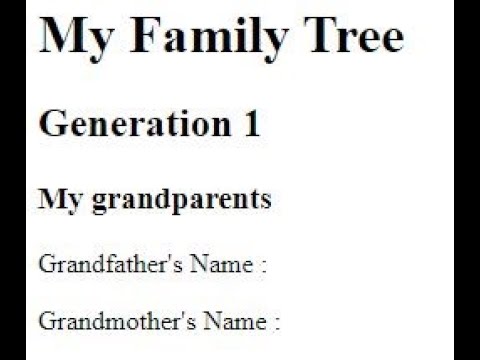
Preview

💻 Activity Instructions
ℹ️ First Step: Click here to remix the project!
Make sure you're logged into EduBlocks before clicking the link!
Part One: Setting Up Your Webpage (5 minutes)
-
Create a title for your webpage
- Find the title block in EduBlocks
- Type something like "My Family Tree" or "[Your Name]'s Family"
- This title will appear in the browser tab
-
Add the main heading
- Use an H1 block for your main title
- Type "My Family Tree" or create your own title
- This will be the biggest text on your page
💡 Tip You can use nicknames instead of real names if you want to keep your family information private!
Part 2: Organizing Generations (10-15 minutes)
-
Create a heading for your first generation
- Use an H2 block
- Start with your oldest generation (like grandparents)
- Type something like "First Generation: Grandparents"
-
Add relationship headings
- Use H3 blocks for specific relationships
- For example: "My Grandma" or "My Grandpa"
- This helps organize your family members clearly
-
Add family member names
- Use P blocks (paragraph blocks) for each name
- Type one name per P block
- You can add fun facts about each person too!
💡 Tip Remember the heading hierarchy:
- H1 = Biggest (main title)
- H2 = Medium (generation titles)
- H3 = Smaller (relationship titles)
- P = Regular text (names and details)
Part 3: Making It Look Nice (5-10 minutes)
- Add spacing between sections
- Use the spacing block shown below
- Add it between different generations
- This makes your family tree easier to read

- Optional: Add your pets! 🐾
- Create a special section for family pets
- Use an H2 block titled "Our Family Pets"
- List their names using P blocks
Part 4: Final Touches (5 minutes)
-
Review your family tree
- Check that all headings are in the right order
- Make sure spacing looks good
- Add any missing family members
-
Test your webpage
- Click the preview button to see how it looks
- Make any final adjustments
- Save your project!
🔧 Troubleshooting
Having problems? Here are some common issues and solutions:
⚠️ Warning Can't see your text?
- Make sure you've connected your blocks properly
- Check that you've typed text inside each block
- Try refreshing the preview
⚠️ Warning Spacing looks weird?
- Use the spacing block between sections, not between every line
- One spacing block creates a nice gap
- Too many spacing blocks can make your page look empty
✍️ Project Submission
ℹ️ Time to submit your amazing family tree! When you've finished creating your family tree webpage:
- Make sure your project is saved in EduBlocks
- Test that all elements display correctly
- Click the link below to submit
Tips for Success
💡 Before coding: Draw your family tree on paper first
💡 Privacy tip: Use fun nicknames or initials if you prefer
💡 Be creative: Add favorite colors or hobbies for each person
💡 Organization: Keep generations clearly separated
💡 Testing: Always preview your work before submitting
Great job completing your first HTML webpage! 🎉